[ad_1]
With split screen, Snap Assist, and virtual desktops, Windows 11 takes the multitasking experience to the next level. You no longer need to switch between different apps to manage your workflow. You can use the built-in multitasking tools to glance over information from all the relevant apps. Here are the best multitasking tips and tricks on Windows 11.
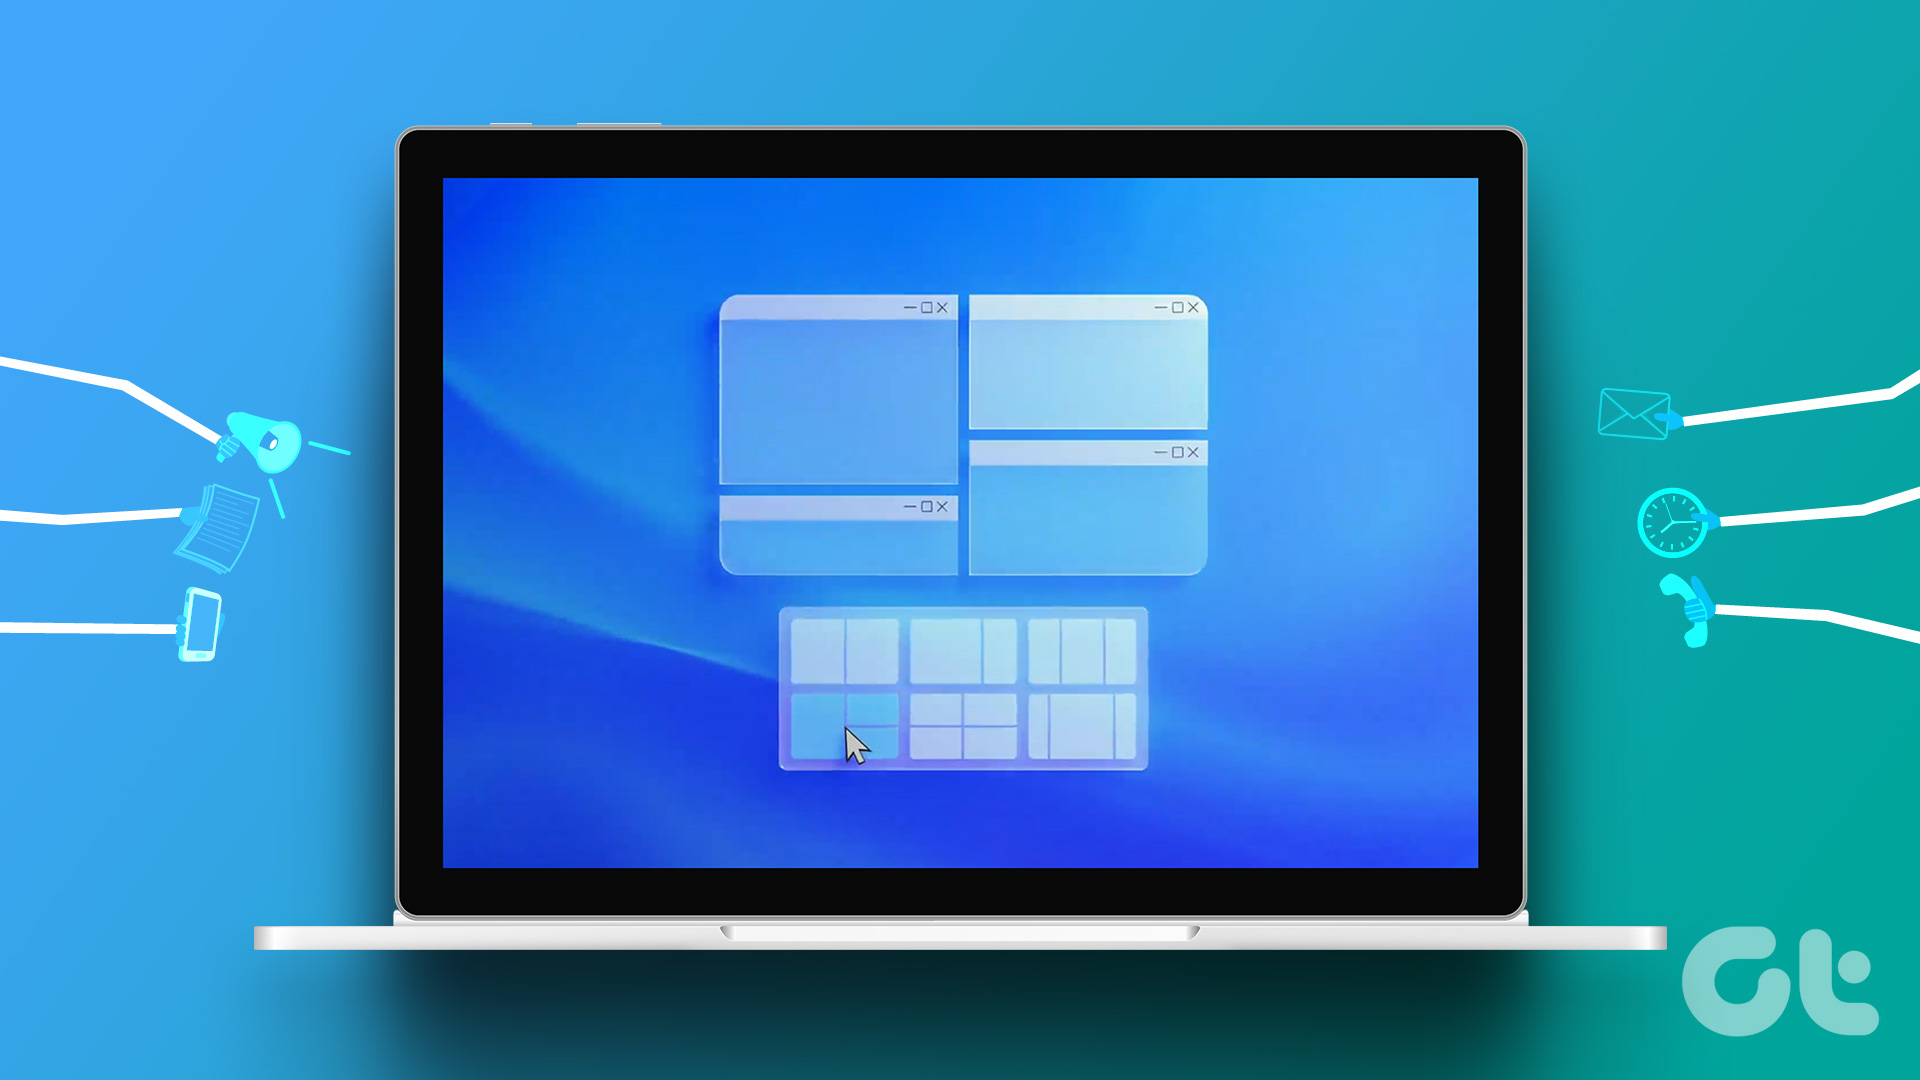
The default Snap assist lets you choose from six layouts to arrange apps. You can also use virtual desktops to organize more apps on your PC. Let’s check all the Windows 11 multitasking tips to take your workflow to the next level.
1. Use Alt + Tab Shortcut
Microsoft has carried over the same effective Alt + Tab multitasking shortcut to Windows 11. You can press Alt + Tab keys and check all the opened app windows in the recents apps menu.


Press the Alt key and hit the Tab key to switch between apps.
2. Enable Snap Windows
Microsoft enables Snap windows by default. If you have accidentally disabled it, use the steps below to turn on the function.
Step 1: Press Windows + I keys to open the Settings app.
Step 2: Select Multitasking from the System menu.


Step 3: Enable the ‘Snap windows’ toggle. Expand the same menu and click the checkmark beside all Snap windows options.
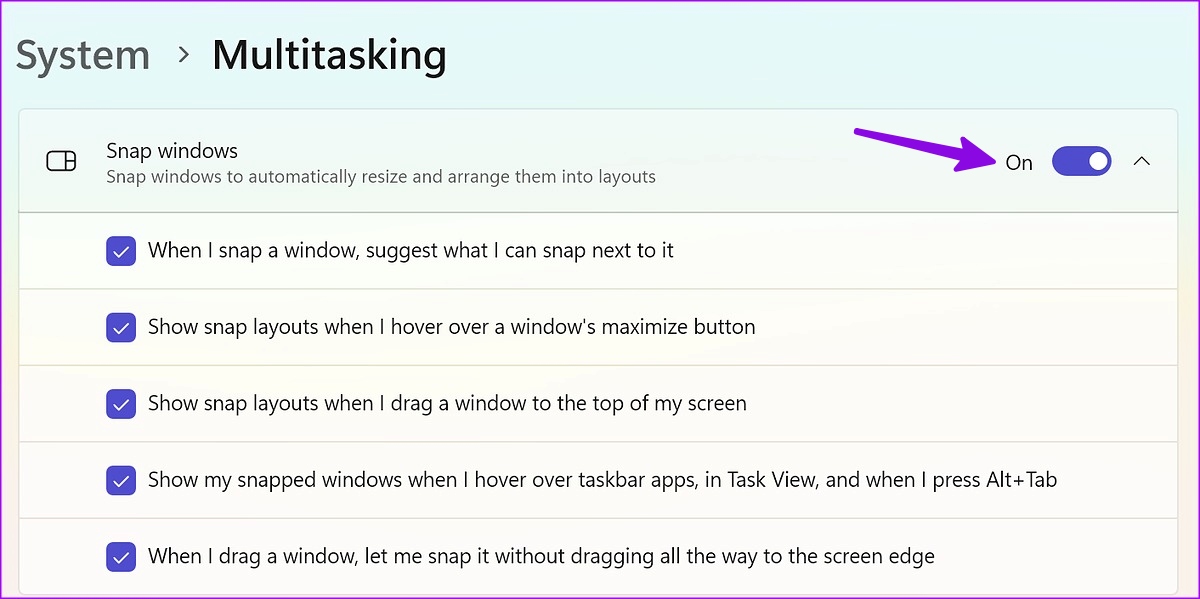

After you enable Snap Assist, check it in action.
3. Use Split Screen on Windows 11
As the name suggests, a split screen lets you browse two apps simultaneously. Enabling the function is quite easy on Windows 11.
Step 1: Open any app on Windows 11.
Step 2: Move it to the right or left side of the window.
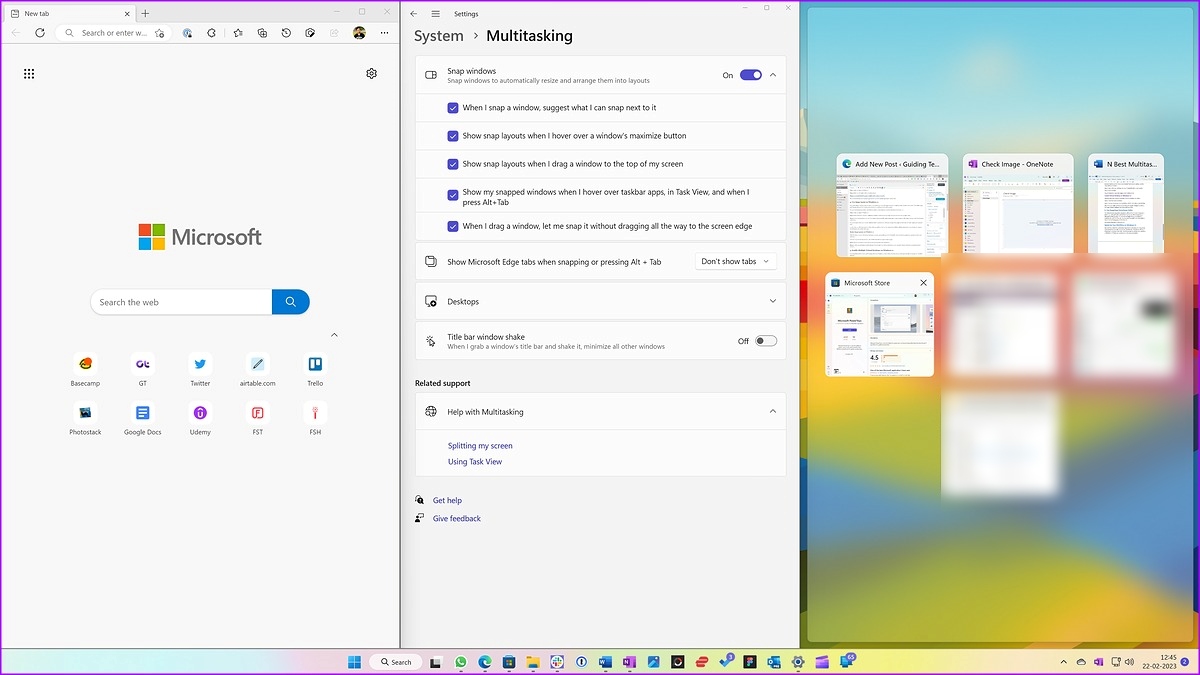
Step 3: An indicator should appear to enable a split screen on your PC.


The system shows the rest of opened apps and lets you select another app to place side by side.


4. Use Snap Assist on Windows 11
Snap Assist shows a windows layout based on your screen size. If you use Snap windows on a laptop, it may only show four options. The system shows more layouts when you try to enable snap windows on a desktop or ultra-wide monitor.
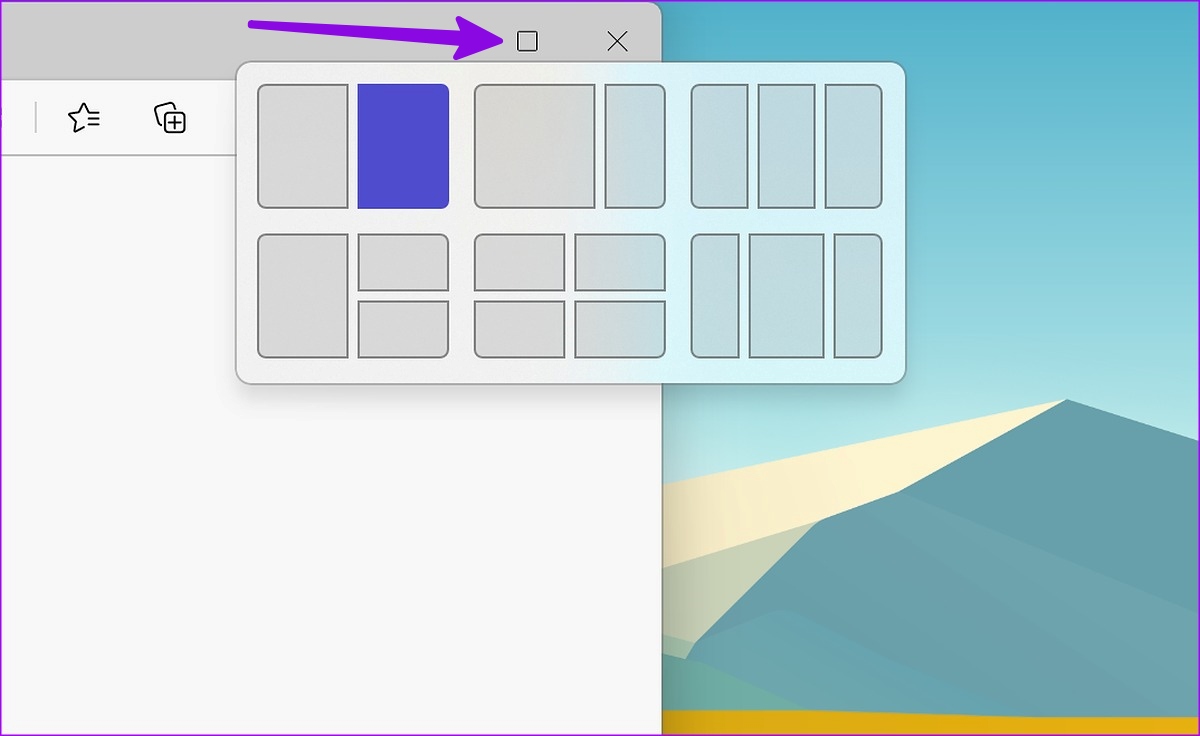
You can use keyboard shortcuts or the Maximize button in the menu bar to enable Snap Assist on Windows 11.
Step 1: Open any app on Windows 11.
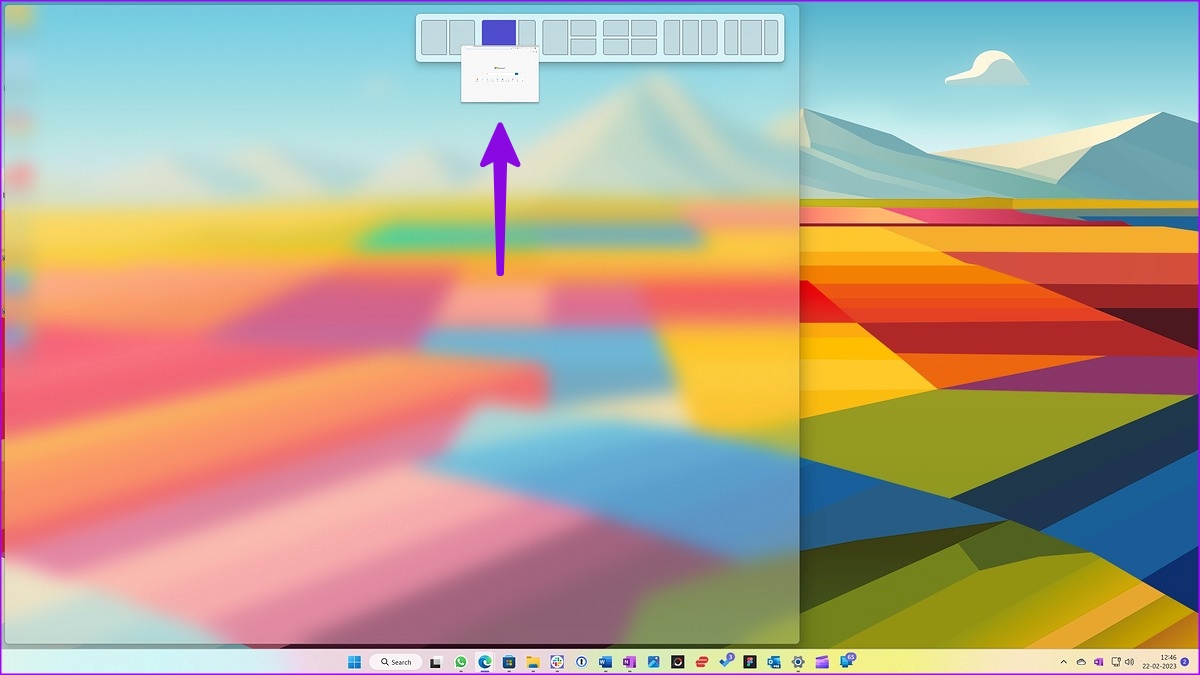
Step 2: Press Windows + Z keys to enable Snap windows. Check the available app window layouts from the top-right corner.
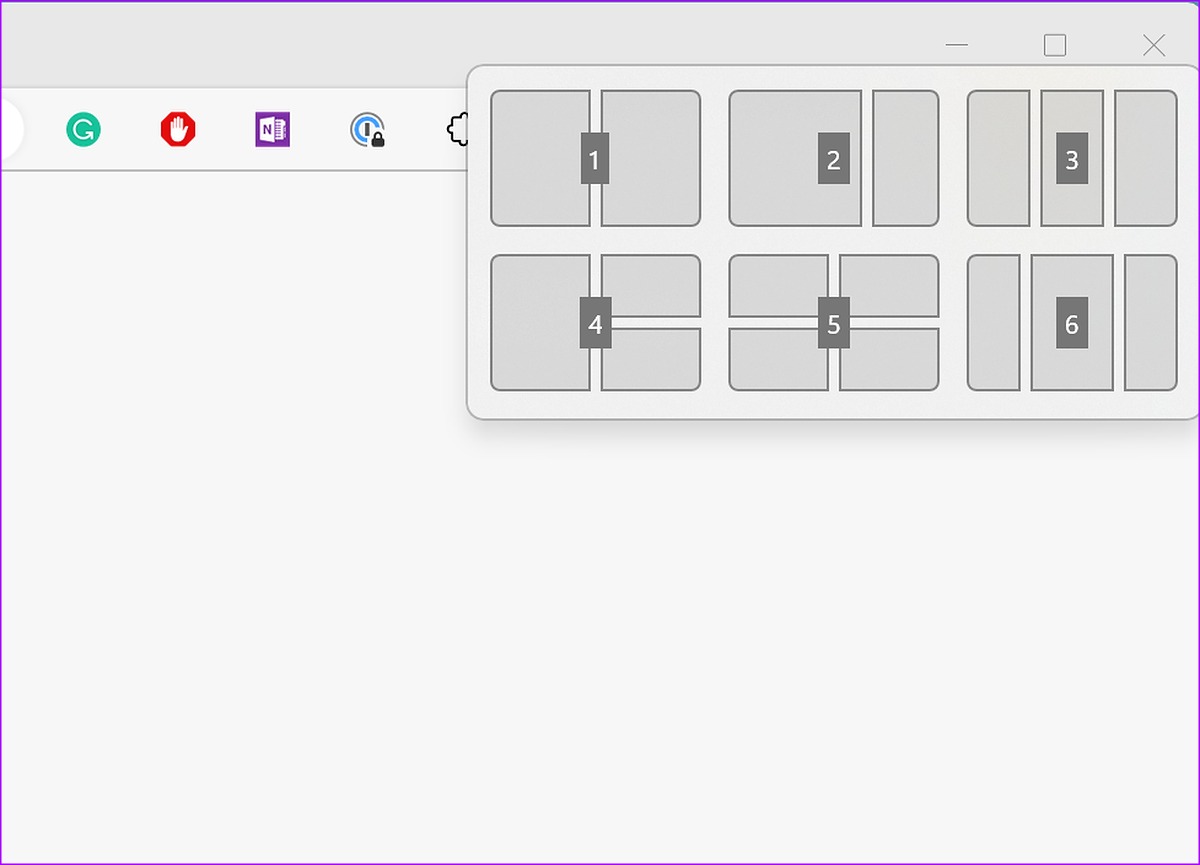

Step 3: Select a relevant layout and size. The system will automatically suggest other apps to place alongside. Select apps, and you check all of them on your screen.

You can also place the cursor over the maximize button and select one of the snap layouts. Some apps like Slack may not show snap layouts using this trick.

Another way to enable Snap Assist is to hover the app window at the top. The system shows all the available snap layouts. You can place the app in a relevant layout and arrange other apps.

Resize Snap Layouts on Windows 11
While Windows 11 comes with several snap layouts, it may not be sufficient for all. Thankfully, Microsoft lets you adjust the snap layout size to your preference.
Once you snap relevant app windows, use the slider between two apps to resize the app.
Step 1: Hover your cursor over the thin line between two apps in the snap layout.
Step 2: A slider will appear to make changes. You can slide it in a relevant direction to resize the app window. Check the screenshot below for reference.


5. Enable Multiple Virtual Desktops on Windows 11
Virtual desktop is another handy multitasking add-on for Windows 11 users. It lets you divide your personal and work apps to manage your workflow efficiently.
Enable Task View on Windows 11 Taskbar
Windows 11 has a dedicated Task view button on the taskbar to switch between desktops easily. If you have disabled Task view on taskbar, use the steps below to enable it.
Step 1: Press Windows + I keys to open the Settings app and select Personalization from the left sidebar.
Step 2: Select Taskbar from the right pane.


Step 3: Enable the Task view toggle under Taskbar items.


Create a Virtual Desktop on Windows 11
Now that you have enabled Task view, it’s time to check it in action.
Step 1: Click Task view icon on the taskbar.
Step 2: You can check your current desktop. Select + to create a new desktop.


Step 3: You can right-click on a new desktop to rename, change its position, and apply another wallpaper for better differentiation.


6. Use PowerToys FancyZones Utility


The default multitasking tricks should be sufficient for most. If you are a power user and want better control over app layout, check FancyZones in Microsoft PowerToys app. It’s a window manager add-on for snapping windows into preferred layouts. You can check Microsoft’s dedicated post to learn to set up FancyZones on Windows 11.
Speed Up Your Workflow on Windows 11
Microsoft has nailed the multitasking experience on Windows 11. Snap Assist implementation is smooth, easy to use, and effective. FancyZones add-on in PowerToys is the icing on the cake. How do you plan to manage your workflow in Windows 11? Share your preference in the comments below.
[ad_2]
Source link


